HOW TO ASSEMBLE YOUR AIRBRUSH GUN
HOW TO ASSEMBLE YOUR AIRBRUSH GUN
-

STEP 1:
Using tweezers or your fingers, place the brass nozzle on the front of the airbrush gun.
-

STEP 2:
Screw on the nozzle to the tip of the airbrush gun.
-

STEP 3:
Screw on the nozzle cap.
-

STEP 4:
Screw on the needle cap.
-

STEP 5:
Hold the airbrush gun in your hand at a 45 degree angle, insert the trigger sideways into the body and twist so the lines face the front of the airbrush body.
-

STEP 6:
With the body at an angle, grasp the needle chucking guide and insert it into the back of the airbrush gun. This action will push the trigger forward.
-

STEP 7:
Slide the spring over the needle chucking guide.
-

STEP 8:
Screw on the spring case, twisting clockwise.
-

STEP 9:
Gently insert the needle.
-

STEP 10:
Screw on the needle chucking nut.
-

STEP 11:
Screw on the tail cap.
-

STEP 12:
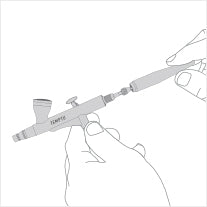
Your airbrush gun is now assembled!
Featured Video: Assembling Your Airbrush Gun (SP-35)
-

STEP 1:
Using tweezers or your fingers, place the brass nozzle on the front of the airbrush gun.
-

STEP 2:
Screw on the nozzle to the tip of the airbrush gun.
-

STEP 3:
Screw on the nozzle cap.
-

STEP 4:
Screw on the needle cap.
-

STEP 5:
Hold your airbrush gun in your hand at a 45 degree angle. Insert the trigger lever in to the body. Make sure it resembles an S when inserted.
-

STEP 6:
Place the trigger in the body making sure the piston goes through to the bottom of the airbrush gun. Insert the needle chucking guide behind the trigger lever.
-

STEP 7:
Slide the spring over the needle chucking guide.
-

STEP 8:
Screw on the spring case, twisting clockwise.
-

STEP 9:
Gently insert the needle.
-

STEP 10:
Screw on the needle chucking nut.
-
STEP 11:
Screw on the tail cap.
-

STEP 12:
Your airbrush gun is now assembled!